Let’s sew a scrunchie. Scrunchies are fun and practical accessories that can be customised with various fabrics, sizes, and colours. Whether you’re new to sewing or experienced, making a scrunchie is a straightforward project. In this guide, we’ll walk you through everything you need to know, including the necessary measurements, fabric and elastic choices, and a detailed step-by-step guide to sewing your own scrunchie.
What Size Should a Scrunchie Be?
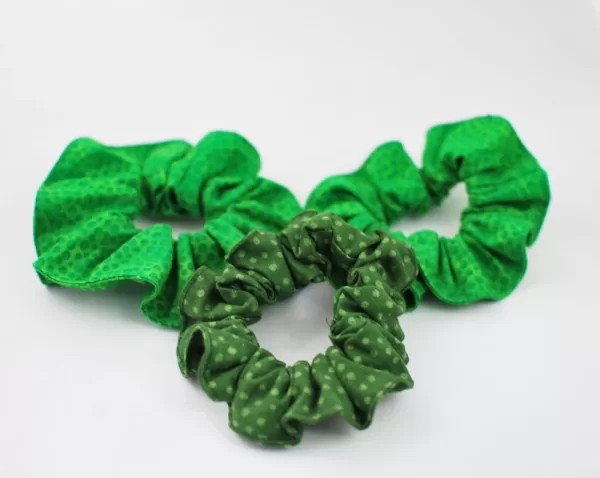
The typical measurements for a standard scrunchie vary a lot and you can adapt the sizes to suit your requirements. These are the finished measurements of the scrunchies we sell:
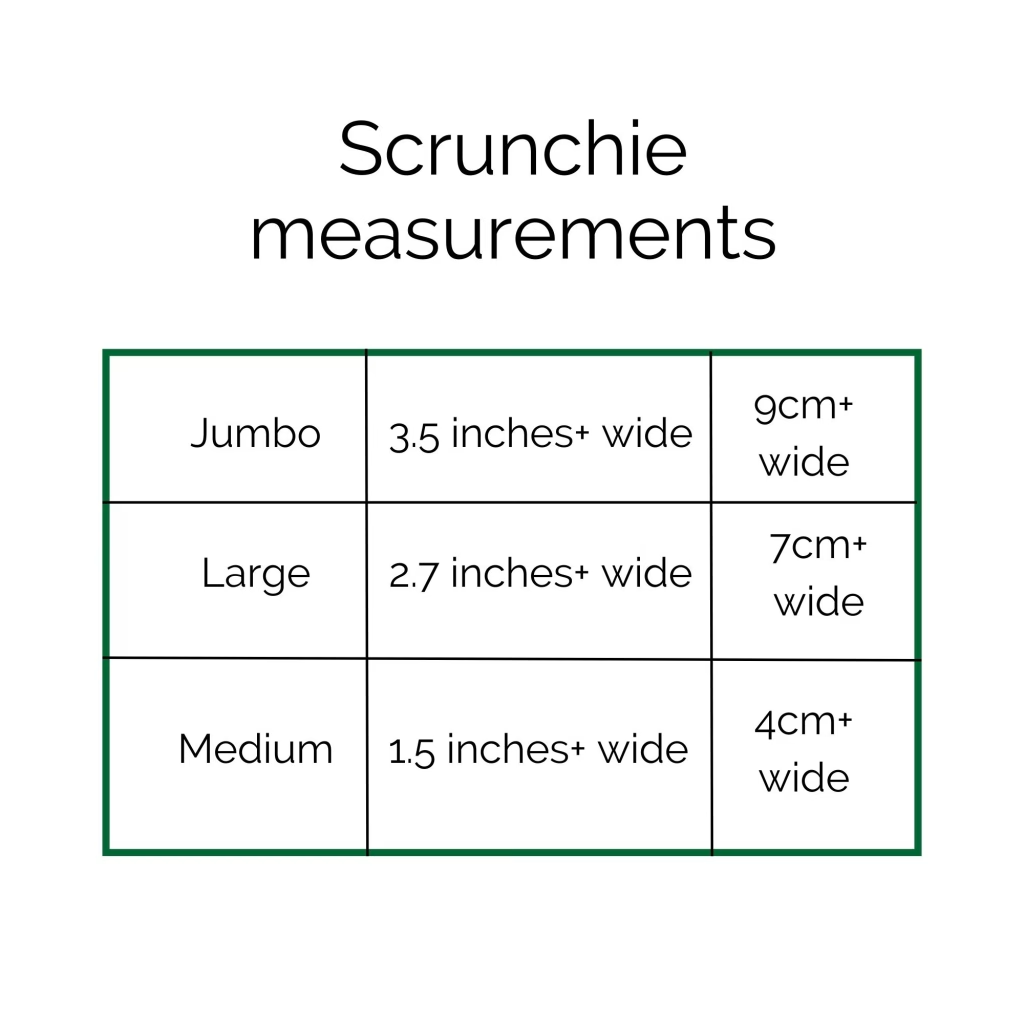
The above show the width of a finished scrunchie. The wider the scrunchie, bolder the look. Other than the width, you need to work out how long you need to cut the fabric and how much elastic you need to add.
How Much Fabric Do I Need to Cut for a Scrunchie?
Fabric needed to make one scrunchie will mainly depend on how wide do you want your scrunchie. If you had a fat quarter or a some fabric scraps, that should be sufficient.Print the free template (see below) and use it as a guide to work out how much fabric you would need.
As a thumb rule, multiply the width of the scrunchie by 2 and add half an inch or 1cm to the measurement. This gives you the width. The fabric should be long enough to gather and scrunch when the elastic is inserted. This is your length. We generally recommend around 50cm long.
What is the Best Fabric to Make Scrunchies?
The best fabrics for scrunchies are soft and easy to gather. Here are a few common options:
- Cotton or Linen: Easy to work with and versatile.
- Silk or Satin: Luxurious and gentle on hair.
- Velvet: For scrunchies with a plush feel.
- Jersey Knit: Stretchy and great for sporty scrunchies.
- Transparent & Net fabrics: For a naked scrunchie look
The best fabric to make your first scrunchie is the fabric you already have and are happy to cut up. An old linen top or a pillow cover you no longer need will work perfectly. Once you are confident of the steps and your sewing, you can step up to buy some fancy fabrics.
How Much Elastic Do You Need for a Scrunchie?
You’ll need 20-25cm of elastic for a standard scrunchie, or up to 30cm for a jumbo scrunchie. Adjust the length based on how tight or loose you want the scrunchie to fit.
What is the Best Elastic for Scrunchies?
Elastic width between 6-10mm works best. Narrow elastic (around 6mm) is ideal for smaller scrunchies, while 8-10mm elastic provides better support for larger scrunchies.
Do You Use Woven or Braided Elastic for Scrunchies?
Braided elastic is preferred because it is flexible and retains its shape after stretching. Woven elastic is more rigid, making it less suitable for scrunchies that need flexibility.
Do You Need a Sewing Machine to Make a Scrunchie?
You don’t need a sewing machine to make a scrunchie. While using a sewing machine is faster, you can hand-sew a scrunchie with a simple running or backstitch. Both methods work well and produce a durable scrunchie.
How to Sew a Scrunchie step by step
Now that you’ve gathered your materials, it’s time to sew! Here’s a simple step-by-step guide for making your scrunchie.
Materials You’ll Need:
- Chosen Fabric
- Elastic (20-25cm for a standard scrunchie)
- Sewing machine or hand-sewing needle and thread
- Safety pin or loop turner
- Scissors
- Pins
Step 1: Cut Your Fabric and Elastic
First, cut your fabric using the free scrunchie pattern given below.
Cut your elastic to a length of 20-25cm, depending on how tight or loose you want it.
Step 2: Fold and Sew the Fabric
Fold the fabric strip lengthwise with the right sides together, so the printed side is inside. Pin it along the long edge to hold it in place. Sew along the long edge with a 1cm seam allowance, leaving the ends open.
If you’re hand-sewing, use a backstitch for durability.
Step 3: Turn the Fabric Right Side Out
Once sewn, turn the fabric tube right side out. The easiest way to do this is by attaching a safety pin to one end of the fabric and pulling it through the tube. Alternatively, use a loop turner to reverse the fabric tube.
Step 4: Insert the Elastic
Attach a safety pin to one end of your elastic and thread it through the fabric tube. Make sure to hold onto the other end of the elastic so it doesn’t get pulled through. Once the elastic is threaded through the tube, overlap the ends by about 1cm and sew them together securely.
Step 5: Close the Scrunchie
Tuck one of the raw fabric ends inside the other to create a neat finish. You can either hand-sew this opening closed with an invisible stitch or use a sewing machine to stitch across the opening.
Step 6: Fluff and Wear
Your scrunchie is now complete! Fluff the fabric to distribute the gathers evenly around the elastic, and it’s ready to wear. Experiment with different fabrics and sizes to create a variety of scrunchies.
In other scrunchie news
Discover jumbo scrunchie measurements: Jumbo Scrunchie Measurements Unveiled
And here’s a fun fact – did you know scrunchie on a wrist does mean something? Why do Guys wear Scrunchies on the wrist?